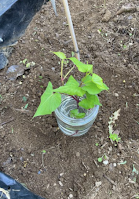
Just before the school holidays, Mrs McLellan showed us how to sprout kumara in our online meeting.
1. Poke 4 toothpicks into the side of a kumara and balance it in a jar or container.
2. Add water to the jar so that the bottom of the kumara is covered with water.
3. Place the jar in a sunny spot for a few weeks and wait for the roots and leaves to grow.

Just before we could come back to school in our bubbles, Mrs McLellan carefully pulled off the shoots (with their roots) and put them in another jar to bring to school. Here's a video of her explaining how.
In the afternoon of Bubble 7's first day back at school, we went to our school garden to plant the kumara shoots. First we had to clear away lots of weeds and overgrown vegetables. We left some parsley, curly kale and a cabbage growing. We harvested a handful of tiny potatoes and a spring onion (which we gave to the two gardening group students in the senior block).


On a sunny afternoon, it was hard, hot work with our masks on! We filled up the compost bin, and worked together to drag the rest of the weeds to top up Dave's compost bin by the pool too. We were visited by a chirpy piwakawaka and were surprised by a spider, as we disturbed its resting place. We'll try to identify it in our bubble class this coming week.


When the garden was cleared, we worked in pairs to plant the kumara shoots. We put the roots in a hole, laid the shoot sideways towards the east (where the sun rises) and covered part of the stems. This is supposed to help the plant make more roots and grow more kumara. Then we watered our plants and headed back to the classroom for a well-deserved rest! Our bodies were certainly feeling the effort and satisfaction that goes into providing healthy food.